How to Cook Beef Short Ribs on the Stove: A Culinary Guide

Beef short ribs, when prepared correctly, are a symphony of flavor and texture. The rich, savory meat, imbued with the essence of the bone, becomes meltingly tender after hours of slow cooking. The result is a luxurious dish reminiscent of pot roast, but with a more refined presentation and an intensely satisfying experience of pulling the meat directly from the bone.
The beauty of cooking short ribs on the stovetop lies in its precise control and development of deep, layered flavors. The initial searing builds a foundation of caramelized richness, while the slow braising process coaxes out the inherent tenderness of this otherwise tough cut. This method allows for constant monitoring and adjustments, ensuring the perfect balance of moisture and flavor infusion.
Understanding Beef Short Ribs
Navigating the world of short ribs can be confusing, as they come in various cuts. For braising, bone-in short ribs are essential. Look for "English cut" short ribs, which are individual ribs, or "flanken cut," which are cut across the bone, resulting in thinner, wider pieces. English cut is generally preferred for braising. The bone marrow and surrounding tissues render during cooking, contributing significantly to the sauce's depth and richness. When selecting, look for ribs with good marbling – the intramuscular fat that melts during cooking, creating incredibly juicy and flavorful meat. Avoid ribs that appear overly fatty, as this can lead to a greasy final product.
Why Cook Short Ribs This Way?
- Versatility: Braised short ribs are a blank canvas for flavor. You can adapt the braising liquid with different wines, beers, stocks, and aromatics to create countless variations.
- Flavor: Searing the ribs and deglazing the pan creates a layered depth of flavor that's simply unmatched.
- Convenience: Once the initial steps are complete, the stovetop method requires minimal intervention.
Preparation (Mise en Place)
- Thawing: If using frozen short ribs, thaw them completely in the refrigerator for 24-48 hours. Never thaw meat at room temperature.
- Patting Dry: This is crucial! Use paper towels to thoroughly dry the surface of the short ribs. Moisture is the enemy of searing; dry meat browns more effectively.
- Trimming (Optional): While marbling is desirable, excessive surface fat can lead to a greasy braise. Trim any large, thick areas of fat, but leave the marbling intact.
Essential Tools
- Dutch Oven or Heavy-Bottomed Pot: A Dutch oven's thick walls and tight-fitting lid ensure even heat distribution and minimal moisture loss during braising. If you don't have a Dutch oven, use a heavy-bottomed pot with a tight-fitting lid.
- Tongs: For safely handling and turning the ribs during searing.
- Large Plate or Baking Sheet: For holding the seared ribs.

The Cooking Method(s): Stovetop Braising
Method 1: Stout Beer Braised Short Ribs
This method utilizes the rich, dark flavors of stout beer to create a deeply savory and complex braising liquid.
Ingredients:
- 1 pound beef short ribs (450g)
- 2 tablespoons all-purpose flour (30g)
- 1 teaspoon salt (5g)
- ½ teaspoon ground black pepper (2.5g)
- 1 tablespoon olive oil (15ml)
- 1 tablespoon butter (15g)
- 1 medium onion, sliced (approx. 150g)
- 1 clove garlic, minced
- 1 (12 fluid ounce) can or bottle stout beer (355ml)
- 1 cup beef stock (240ml)
- Prepare the Ribs: Pat the short ribs dry with paper towels. Season generously with salt and pepper. Place flour on a plate and dredge each rib in the flour, shaking off any excess.
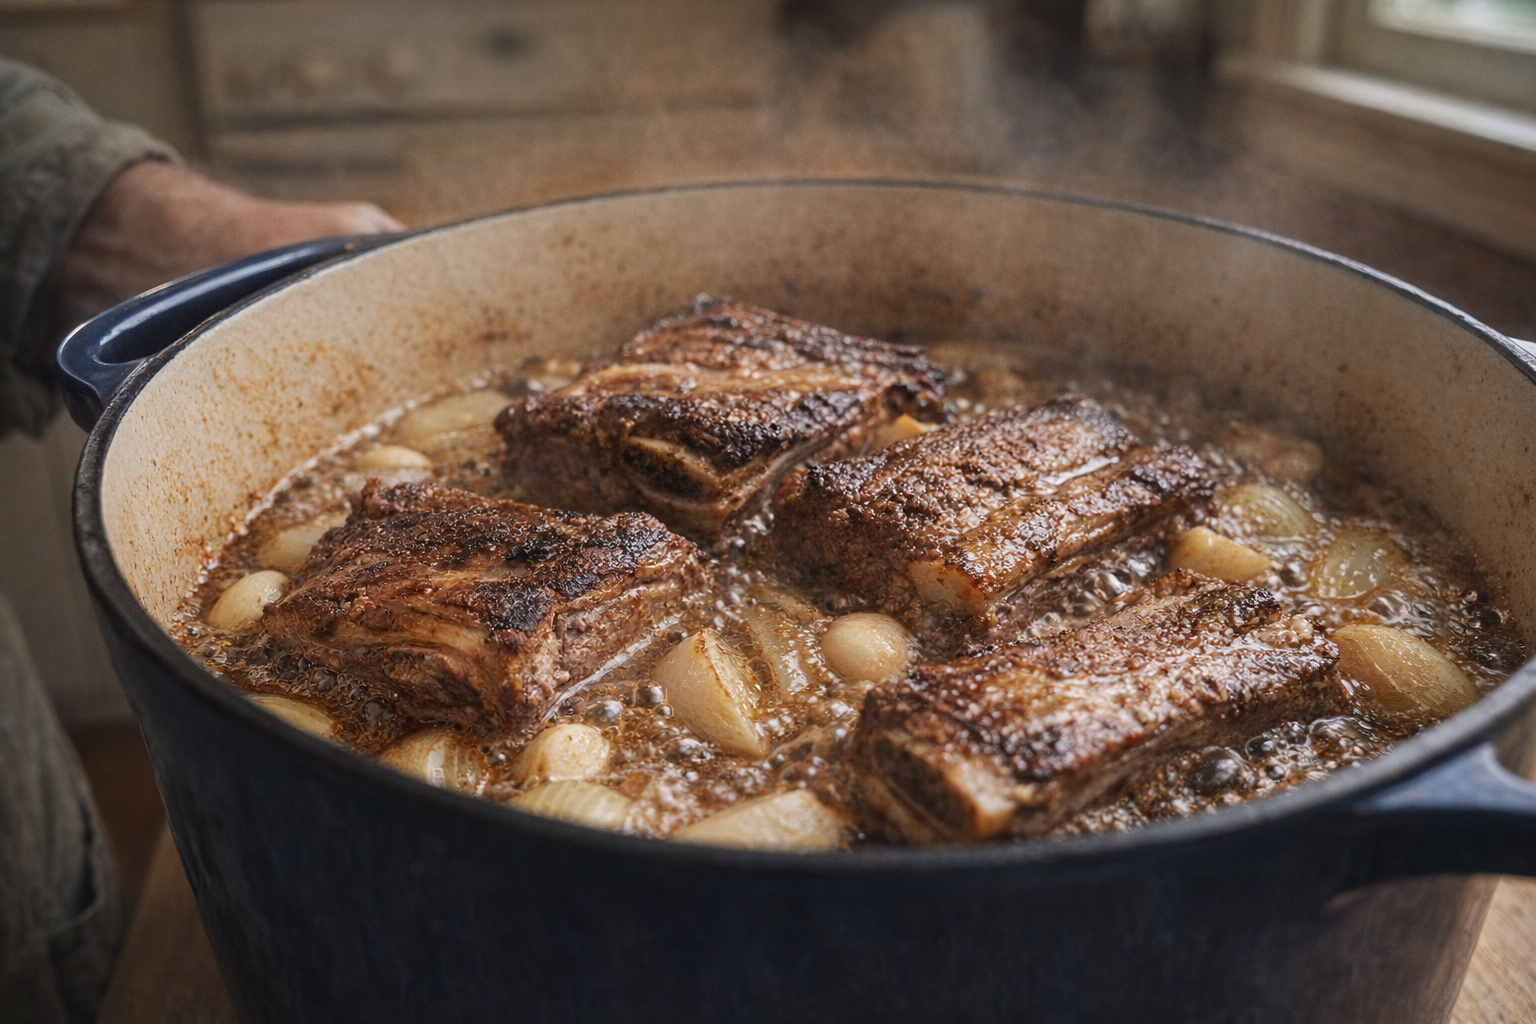
- Sear the Ribs: Heat olive oil and butter in a Dutch oven over medium-high heat until shimmering. Add the floured short ribs in a single layer, being careful not to overcrowd the pot (work in batches if necessary). Sear for 4-5 minutes per side, until deeply browned. Listen for a satisfying sizzle as the meat hits the hot surface. The kitchen will start to fill with a savory aroma.
- Sauté Aromatics: Remove the seared ribs and set aside. Add sliced onion to the pot and cook, stirring occasionally, until softened and translucent, about 5-7 minutes. Add minced garlic and cook for another minute until fragrant. The onions will begin to caramelize and pick up the browned bits from the bottom of the pot, creating a rich flavor base.
- Deglaze and Braise: Pour in the stout beer, scraping up any browned bits from the bottom of the pot with a wooden spoon. Add beef stock. Bring the liquid to a simmer.
- Slow Cook: Return the short ribs to the pot, nestling them into the braising liquid. The liquid should come about halfway up the sides of the ribs. Bring to a gentle simmer, then reduce heat to low, cover tightly, and braise for 2-2.5 hours, or until the ribs are fork-tender. The braising liquid will bubble gently, and the aroma of the stout beer and beef will permeate the kitchen.
- Reduce Sauce (Optional): Remove the ribs from the pot and set aside. If the sauce is too thin, increase the heat to medium and simmer uncovered for 5-10 minutes, or until the sauce has reduced to your desired consistency.
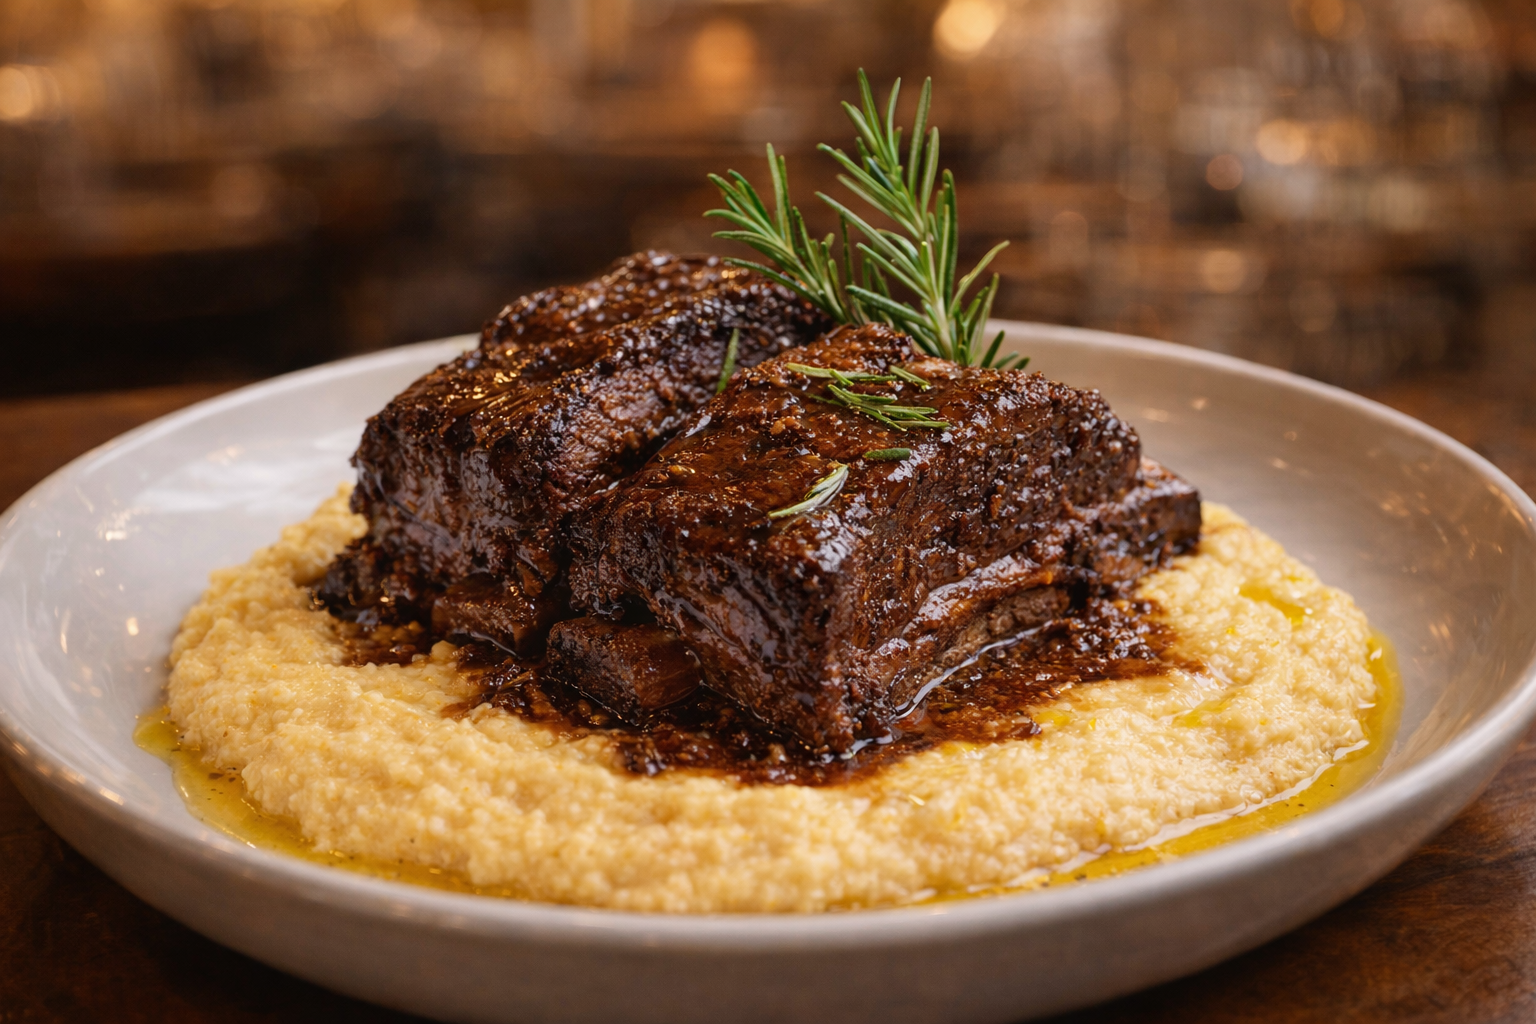
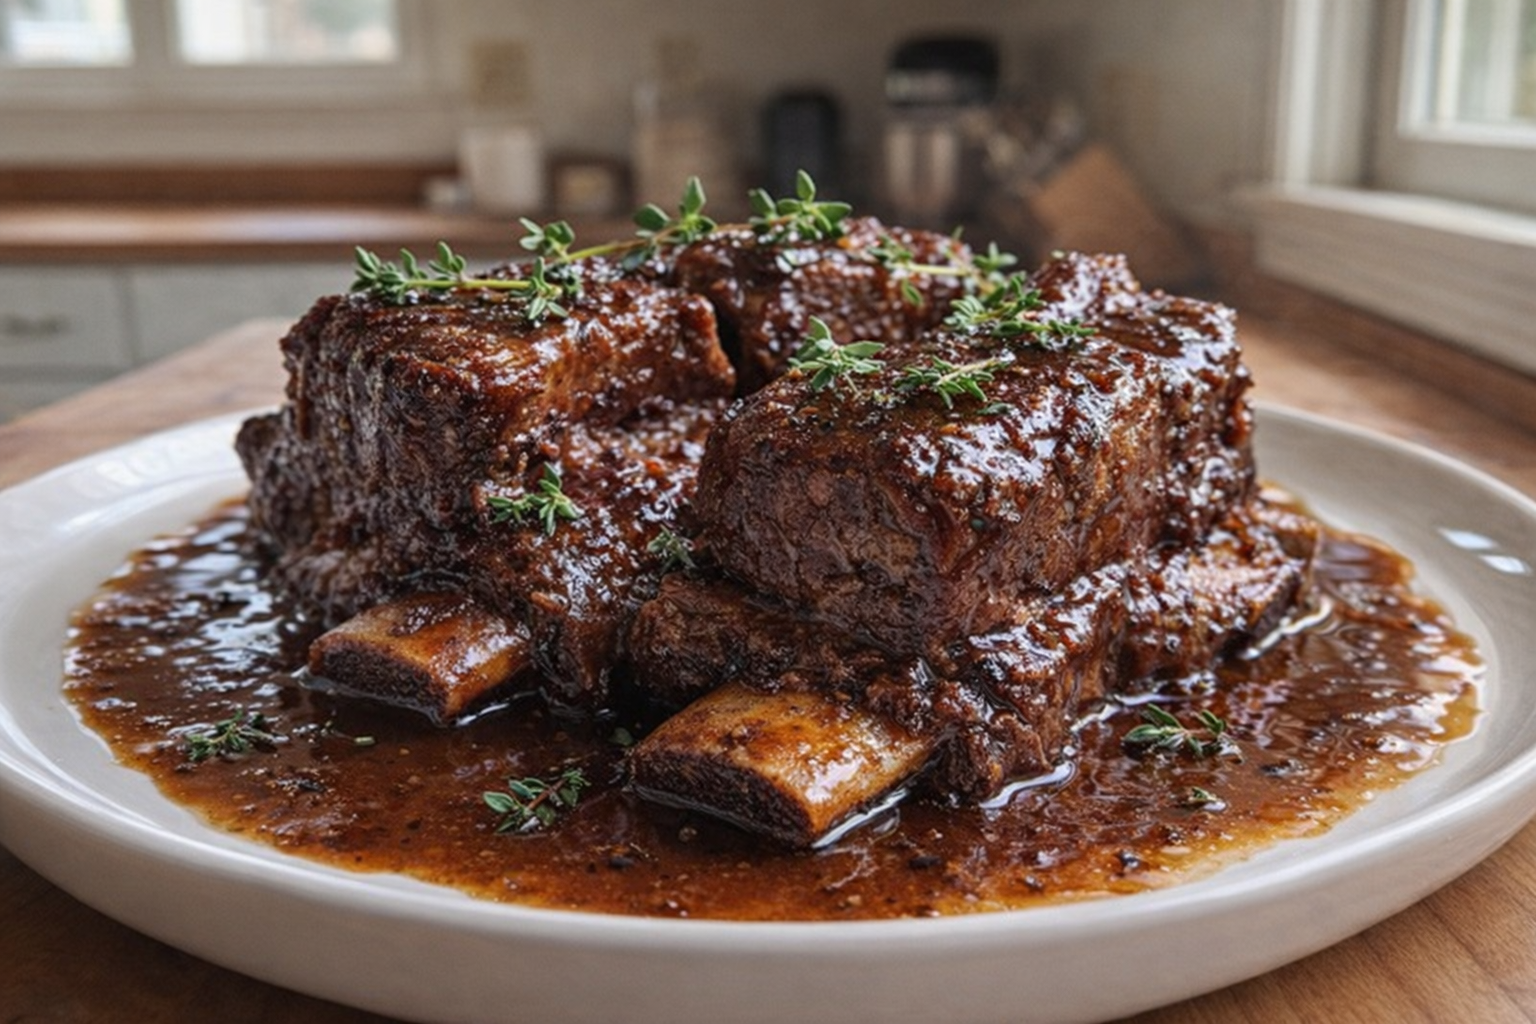
- Serve: Place the tender short ribs on a serving platter and spoon the rich braising sauce over the top.
Cooking Time & Doneness Guide
- Cooking Time: 2-2.5 hours
- Internal Temperature: While not always necessary for braised dishes, an internal temperature of 203°F (95°C) indicates optimal tenderness.
Visual Cues
The most reliable way to determine doneness is by feel. The ribs are ready when a fork easily pierces the meat and it almost falls off the bone. The meat should be incredibly tender and yielding.
Tips for Perfection
- Don't Overcrowd the Pot: Overcrowding lowers the pan temperature, preventing proper searing. Work in batches if necessary.
- Use a Tight-Fitting Lid: A tight-fitting lid is crucial for maintaining moisture during braising. If your lid doesn't fit well, cover the pot with a sheet of aluminum foil before placing the lid on top.
- Resist the Urge to Rush: Braising is a slow process. Resist the urge to increase the heat to speed things up. Low and slow is the key to tender, flavorful short ribs.
- Check Liquid Levels: Check the liquid level periodically during braising. If the liquid is evaporating too quickly, add more beef stock or water to keep the ribs partially submerged.
Storage & Reheating
- Storage: Allow leftover short ribs to cool completely before storing them in an airtight container in the refrigerator. They will keep for up to 3-4 days.
- Reheating: The best way to reheat short ribs is in the oven. Place the ribs and braising liquid in an oven-safe dish, cover tightly with foil, and heat at 300°F (150°C) until warmed through, about 20-30 minutes. You can also reheat them in a saucepan over low heat, stirring occasionally, until warmed through. Avoid microwaving, as this can dry out the meat.
Serving Suggestions
- Mashed Potatoes: A classic pairing, perfect for soaking up the rich braising sauce.
- Creamy Polenta: A comforting and elegant alternative to mashed potatoes.
- Roasted Root Vegetables: Carrots, parsnips, and potatoes add a touch of sweetness and earthy flavor.
- Over Pasta: Toss shredded short rib meat with cooked pasta and a generous spoonful of the braising sauce for a hearty and flavorful meal.
Frequently Asked Questions
While technically possible, boneless short ribs won't provide the same rich flavor and tender texture. The bone marrow and surrounding tissues in bone-in short ribs render during cooking, adding significant depth and richness to the sauce and meat.
Yes, you can use a heavy-bottomed pot with a tight-fitting lid as a substitute for a Dutch oven. The key is to ensure even heat distribution and minimal moisture loss during braising. If your pot's lid isn't very tight, you can cover it with foil before adding the lid.
The short ribs are done when they are incredibly tender and easily pull apart with a fork. They should be meltingly tender, almost falling off the bone. The internal temperature should reach around 203°F (95°C) for optimal tenderness.
Absolutely! Braised short ribs are often even better the next day. Allow the short ribs to cool completely in the braising liquid, then refrigerate. The flavors will meld together even more, and you can easily skim off any solidified fat before reheating.